Getting Started
Essential steps to get started, from installing the theme to customizing your site.
Install the theme
To install the theme, you must have a WordPress installed on your server. Check with the WordPress installation article.
Server requirements
Take a moment to review the server requirements before installation, or you may encounter issues when using our themes.
Consider hosting companies like SiteGround that offer modern PHP versions (8.0+) and caching layers like Varnish. Reliable hosting forms the foundation of a speedy website.
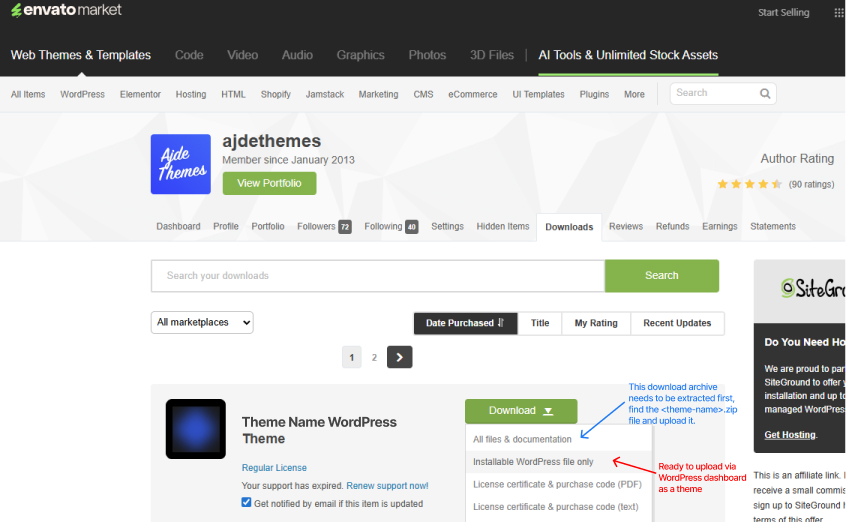
Step 1 - Download the theme files
Download the theme files from ThemeForest > Downloads tab:
Step 2 - Upload the theme and activate
- 1Head to Appearance -> Themes.
- 2Click the Add New button at the top of the screen and click the Upload Theme button.
- 3Upload the theme-name.zip file from your computer and click Install Now.
- 4Once you activate the theme, you will see a notification message to install the required plugins.
Extra Step - Install Child Theme
If you have downloaded all files, the items comes with child theme that is a wrapper to the parent theme and allows you to add custom css, js and php without affecting the original parent theme even if you update it in future.
To use the child theme make sure the parent theme is active first, then upload the theme-name-child.zip and active it. The site should look the same, because no customizations are added yet.
Install the required plugins
When you activate the theme you will be prompted by notification to install and activate all plugins that the theme requires and recommends to work like in the demos. You can also access that recommended plugins menu via Appearance > Install Plugins.
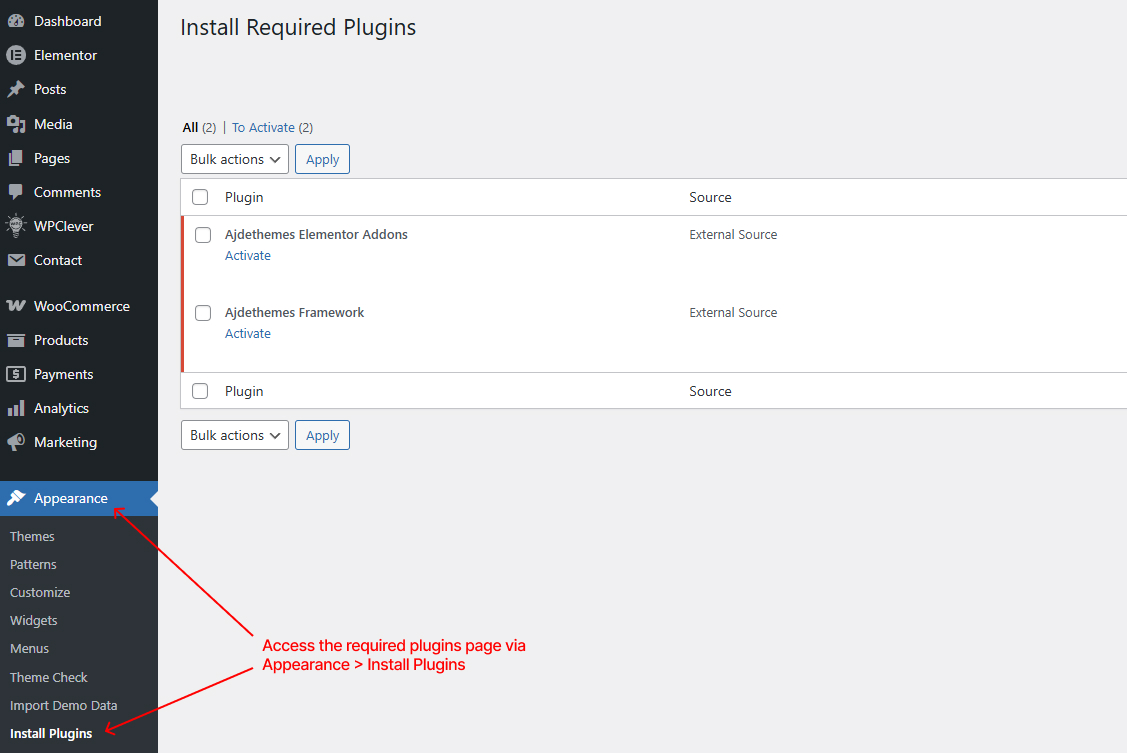
Click on Install plugin notification check all required plugins and decide which one you want from the recommended plugins and check them to be installed (for the demos to import correctly you will need to install and active all recommended plugins also).
Import the demo content
The demo importer is the fastest way to import our starter sites. Using this import feature is recommended for fresh installs.
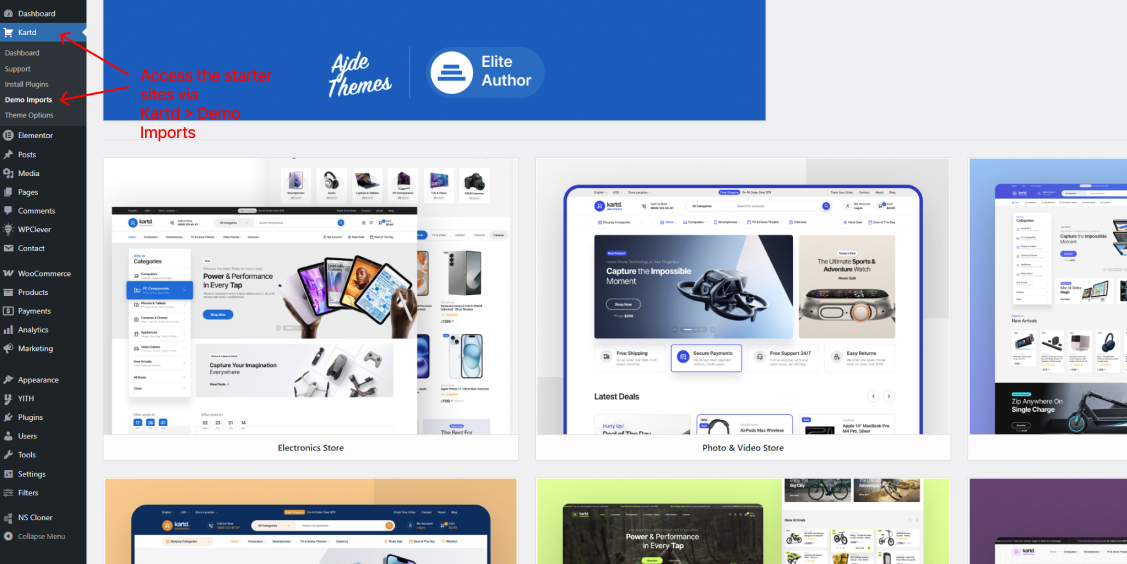
Once the required plugins are installed and activated, mainly Ajdethemes Framework, navigate Kartd > Demo Imports, chose a demo and click Import Demo.
When Importing a Demo
The import might take a long time depending on your internet connection and other factors like number of products, images and elements to be imported.
Do not import more than one demo on the same wordpress installation because ID of element might overwritten and mix, resulting with broken site and duplicate assets and items.
After successful import, you can delete the One Click Demo Import plugin, because you don't need it anymore.